2) Webapps with Docker (Python + Flask)
See also
Contents
- 2) Webapps with Docker (Python + Flask)
- Introduction
- Run a static website in a container : docker run -d dockersamples/static-site
- docker images
- docker run –name static-site -e AUTHOR=”patrick.vergain” -d -P dockersamples/static-site
- docker port static-site
- docker run –name static-site-2 -e AUTHOR=”patrick.vergain” -d -p 8888:80 dockersamples/static-site
- docker stop static-site
- docker rm static-site
- Let’s use a shortcut to remove the second site: docker rm -f static-site-2
- Docker Images
- docker pull ubuntu:16.04
- Create your first image
- Create a Python Flask app that displays random cat pix
- app.py
- requirements.txt
- templates/index.html
- Write a Dockerfile
- Build the image (docker build -t id3pvergain/myfirstapp)
- docker images
- Run your image (docker run -p 8888:5000 –name myfirstapp id3pvergain/myfirstapp)
- Push your image (docker push id3pvergain/myfirstapp)
- docker rm -f myfirstapp
- docker ps
- Dockerfile commands summary
- Next Steps : Deploying an app to a Swarm
Introduction
Great! So you have now looked at docker run, played with a Docker container and also got the hang of some terminology.
Armed with all this knowledge, you are now ready to get to the real stuff, deploying web applications with Docker.
Run a static website in a container : docker run -d dockersamples/static-site
Note
Code for this section is in this repo in the static-site directory.
Let’s start by taking baby-steps. First, we’ll use Docker to run a static website in a container.
The website is based on an existing image.
We’ll pull a Docker image from Docker Store, run the container, and see how easy it is to set up a web server.
The image that you are going to use is a single-page website that was already created for this demo and is available on the Docker Store as dockersamples/static-site.
You can download and run the image directly in one go using docker run as follows:
docker run -d dockersamples/static-site
C:\Tmp>docker run -d dockersamples/static-site
Unable to find image 'dockersamples/static-site:latest' locally
latest: Pulling from dockersamples/static-site
fdd5d7827f33: Pull complete
a3ed95caeb02: Pull complete
716f7a5f3082: Pull complete
7b10f03a0309: Pull complete
aff3ab7e9c39: Pull complete
Digest: sha256:daa686c61d7d239b7977e72157997489db49f316b9b9af3909d9f10fd28b2dec
Status: Downloaded newer image for dockersamples/static-site:latest
3bf76a82d6127dfd775f0eb6a5ed20ce275ad7eaf02b18b2ce50bd96df1432ba
docker images
docker images
REPOSITORY                  TAG                 IMAGE ID            CREATED             SIZE
ubuntu                      trusty              02a63d8b2bfa        17 hours ago        222MB
id3pvergain/get-started     part2               ed5b70620e49        31 hours ago        148MB
friendlyhello               latest              ed5b70620e49        31 hours ago        148MB
alpine                      latest              3fd9065eaf02        6 days ago          4.15MB
wordpress                   latest              28084cde273b        7 days ago          408MB
centos                      latest              ff426288ea90        7 days ago          207MB
nginx                       latest              3f8a4339aadd        2 weeks ago         108MB
ubuntu                      latest              00fd29ccc6f1        4 weeks ago         111MB
python                      2.7-slim            4fd30fc83117        5 weeks ago         138MB
hello-world                 latest              f2a91732366c        8 weeks ago         1.85kB
docker4w/nsenter-dockerd    latest              cae870735e91        2 months ago        187kB
dockersamples/static-site   latest              f589ccde7957        22 months ago       191MB
docker run –name static-site -e AUTHOR=”patrick.vergain” -d -P dockersamples/static-site
C:\Tmp>docker run --name static-site -e AUTHOR="patrick.vergain" -d -P dockersamples/static-site
554e21d4b723a49e4b2019497d4411d955de2175e8b216a126d3a0c214ca9458
In the above command:
- -d will create a container with the process detached from our terminal
- -P will publish all the exposed container ports to random ports on the Docker host
- -e is how you pass environment variables to the container
- –name allows you to specify a container name
- AUTHOR is the environment variable name and Your Name is the value that you can pass
docker port static-site
docker port static-site
443/tcp -> 0.0.0.0:32768
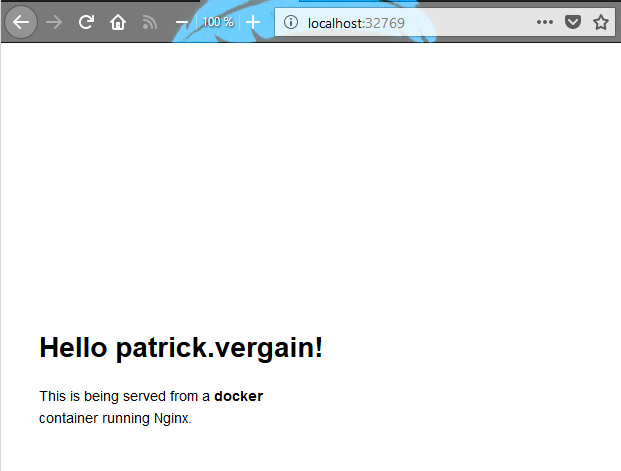
80/tcp -> 0.0.0.0:32769
If you are running Docker for Mac, Docker for Windows, or Docker on Linux, you can open http://localhost:[YOUR_PORT_FOR 80/tcp]. For our example this is http://localhost:32769/
docker run –name static-site-2 -e AUTHOR=”patrick.vergain” -d -p 8888:80 dockersamples/static-site
C:\Tmp>docker run --name static-site-2 -e AUTHOR="patrick.vergain" -d -p 8888:80 dockersamples/static-site
839649f1be575ec442f9fe94d6957b0f218b63af3dfaa8df989f413e86896d16
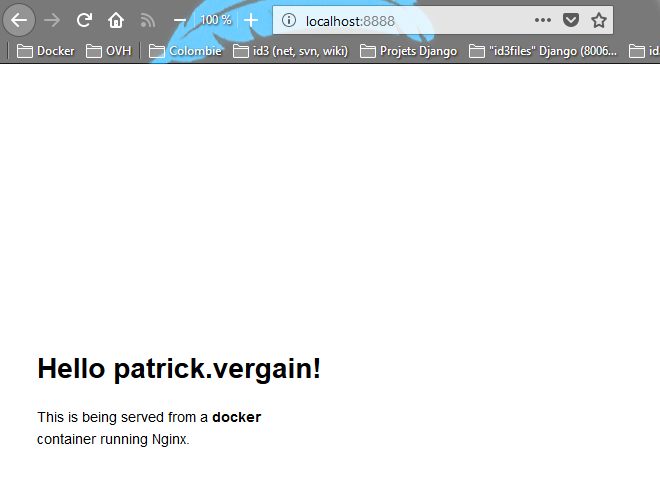
To deploy this on a real server you would just need to install Docker, and run the above docker command(as in this case you can see the AUTHOR is Docker which we passed as an environment variable).
Now that you’ve seen how to run a webserver inside a Docker container, how do you create your own Docker image ?
This is the question we’ll explore in the next section.
But first, let’s stop and remove the containers since you won’t be using them anymore.
Let’s use a shortcut to remove the second site: docker rm -f static-site-2
docker rm -f static-site-2
static-site-2
Docker Images
In this section, let’s dive deeper into what Docker images are.
You will build your own image, use that image to run an application locally, and finally, push some of your own images to Docker Cloud.
Docker images are the basis of containers. In the previous example, you pulled the dockersamples/static-site image from the registry and asked the Docker client to run a container based on that image.
To see the list of images that are available locally on your system, run the docker images command.
C:\Tmp>docker images
REPOSITORY                  TAG                 IMAGE ID            CREATED             SIZE
ubuntu                      trusty              02a63d8b2bfa        18 hours ago        222MB
id3pvergain/get-started     part2               ed5b70620e49        32 hours ago        148MB
friendlyhello               latest              ed5b70620e49        32 hours ago        148MB
alpine                      latest              3fd9065eaf02        6 days ago          4.15MB
wordpress                   latest              28084cde273b        7 days ago          408MB
centos                      latest              ff426288ea90        7 days ago          207MB
nginx                       latest              3f8a4339aadd        2 weeks ago         108MB
ubuntu                      latest              00fd29ccc6f1        4 weeks ago         111MB
python                      2.7-slim            4fd30fc83117        5 weeks ago         138MB
hello-world                 latest              f2a91732366c        8 weeks ago         1.85kB
docker4w/nsenter-dockerd    latest              cae870735e91        2 months ago        187kB
dockersamples/static-site   latest              f589ccde7957        22 months ago       191MB
Above is a list of images that I’ve pulled from the registry and those I’ve created myself (we’ll shortly see how). You will have a different list of images on your machine. The TAG refers to a particular snapshot of the image and the ID is the corresponding unique identifier for that image.
For simplicity, you can think of an image akin to a git repository - images can be committed with changes and have multiple versions. When you do not provide a specific version number, the client defaults to latest.
For example you could pull a specific version of ubuntu image as follows:
docker pull ubuntu:16.04
docker pull ubuntu:16.04
16.04: Pulling from library/ubuntu
8f7c85c2269a: Pull complete
9e72e494a6dd: Pull complete
3009ec50c887: Pull complete
9d5ffccbec91: Pull complete
e872a2642ce1: Pull complete
Digest: sha256:d3fdf5b1f8e8a155c17d5786280af1f5a04c10e95145a515279cf17abdf0191f
Status: Downloaded newer image for ubuntu:16.04
If you do not specify the version number of the image then, as mentioned, the Docker client will default to a version named latest.
So for example, the docker pull command given below will pull an image named ubuntu:latest:
docker pull ubuntu
To get a new Docker image you can either get it from a registry (such as the Docker Store) or create your own. There are hundreds of thousands of images available on Docker Store. You can also search for images directly from the command line using docker search.
An important distinction with regard to images is between base images and child images.
- Base images are images that have no parent images, usually images with an OS like ubuntu, alpine or debian.
- Child images are images that build on base images and add additional functionality.
Another key concept is the idea of official images and user images. (Both of which can be base images or child images.)
Official images are Docker sanctioned images. Docker, Inc. sponsors a dedicated team that is responsible for reviewing and publishing all Official Repositories content. This team works in collaboration with upstream software maintainers, security experts, and the broader Docker community.
These are not prefixed by an organization or user name. In the list of images above, the python, node, alpine and nginx images are official (base) images. To find out more about them, check out the Official Images Documentation.
User images are images created and shared by users like you. They build on base images and add additional functionality. Typically these are formatted as user/image-name. The user value in the image name is your Docker Store user or organization name.
Create your first image
Note
The code for this section is in this repository in the flask-app directory.
Now that you have a better understanding of images, it’s time to create your own. Our goal here is to create an image that sandboxes a small Flask application.
The goal of this exercise is to create a Docker image which will run a Flask app.
We’ll do this by first pulling together the components for a random cat picture generator built with Python Flask, then dockerizing it by writing a Dockerfile.
Finally, we’ll build the image, and then run it.
- Create a Python Flask app that displays random cat pix
- Write a Dockerfile
- Build the image
- Run your image
- Dockerfile commands summary
Create a Python Flask app that displays random cat pix
For the purposes of this workshop, we’ve created a fun little Python Flask app that displays a random cat .gif every time it is loaded because, you know, who doesn’t like cats ?
Start by creating a directory called flask-app where we’ll create the following files:
- app.py
- requirements.txt
- templates/index.html
- Dockerfile
Make sure to cd flask-app before you start creating the files, because you don’t want to start adding a whole bunch of other random files to your image.
app.py
Create the app.py with the following content.
1 2 3 4 5 6 7 8 9 10 11 12 13 14 15 16 17 18 19 20 21 22 23 24 25 26 27 28 29 30 31 32 33 34 | """app.py
"""
from flask import Flask, render_template
import random
app = Flask(__name__)
# list of cat images
images = [
"http://ak-hdl.buzzfed.com/static/2013-10/enhanced/webdr05/15/9/anigif_enhanced-buzz-26388-1381844103-11.gif",
"http://ak-hdl.buzzfed.com/static/2013-10/enhanced/webdr01/15/9/anigif_enhanced-buzz-31540-1381844535-8.gif",
"http://ak-hdl.buzzfed.com/static/2013-10/enhanced/webdr05/15/9/anigif_enhanced-buzz-26390-1381844163-18.gif",
"http://ak-hdl.buzzfed.com/static/2013-10/enhanced/webdr06/15/10/anigif_enhanced-buzz-1376-1381846217-0.gif",
"http://ak-hdl.buzzfed.com/static/2013-10/enhanced/webdr03/15/9/anigif_enhanced-buzz-3391-1381844336-26.gif",
"http://ak-hdl.buzzfed.com/static/2013-10/enhanced/webdr06/15/10/anigif_enhanced-buzz-29111-1381845968-0.gif",
"http://ak-hdl.buzzfed.com/static/2013-10/enhanced/webdr03/15/9/anigif_enhanced-buzz-3409-1381844582-13.gif",
"http://ak-hdl.buzzfed.com/static/2013-10/enhanced/webdr02/15/9/anigif_enhanced-buzz-19667-1381844937-10.gif",
"http://ak-hdl.buzzfed.com/static/2013-10/enhanced/webdr05/15/9/anigif_enhanced-buzz-26358-1381845043-13.gif",
"http://ak-hdl.buzzfed.com/static/2013-10/enhanced/webdr06/15/9/anigif_enhanced-buzz-18774-1381844645-6.gif",
"http://ak-hdl.buzzfed.com/static/2013-10/enhanced/webdr06/15/9/anigif_enhanced-buzz-25158-1381844793-0.gif",
"http://ak-hdl.buzzfed.com/static/2013-10/enhanced/webdr03/15/10/anigif_enhanced-buzz-11980-1381846269-1.gif"
]
@app.route('/')
def index():
url = random.choice(images)
return render_template('index.html', url=url)
if __name__ == "__main__":
app.run(host="0.0.0.0")
|
requirements.txt
In order to install the Python modules required for our app, we need to create a file called requirements.txt and add the following line to that file
1 | Flask==0.10.1
|
templates/index.html
Create a directory called templates and create an index.html file in that directory with the following content in it.
1 2 3 4 5 6 7 8 9 10 11 12 13 14 15 16 17 18 19 20 21 22 23 24 25 26 27 | <html>
<head>
<style type="text/css">
body {
background: black;
color: white;
}
div.container {
max-width: 500px;
margin: 100px auto;
border: 20px solid white;
padding: 10px;
text-align: center;
}
h4 {
text-transform: uppercase;
}
</style>
</head>
<body>
<div class="container">
<h4>Cat Gif of the day</h4>
<img src="{{url}}" />
<p><small>Courtesy: <a href="http://www.buzzfeed.com/copyranter/the-best-cat-gif-post-in-the-history-of-cat-gifs">Buzzfeed</a></small></p>
</div>
</body>
</html>
|
Write a Dockerfile
We want to create a Docker image with this web app. As mentioned above, all user images are based on a base image. Since our application is written in Python, we will build our own Python image based on Alpine. We’ll do that using a Dockerfile.
A Dockerfile is a text file that contains a list of commands that the Docker daemon calls while creating an image. The Dockerfile contains all the information that Docker needs to know to run the app, a base Docker image to run from, location of your project code, any dependencies it has, and what commands to run at start-up. It is a simple way to automate the image creation process. The best part is that the commands you write in a Dockerfile are almost identical to their equivalent Linux commands. This means you don’t really have to learn new syntax to create your own Dockerfiles.
RUN apk add –update py2-pip
The next step usually is to write the commands of copying the files and installing the dependencies. But first we will install the Python pip package to the alpine linux distribution. This will not just install the pip package but any other dependencies too, which includes the python interpreter. Add the following RUN command next:
RUN apk add --update py2-pip
Let’s add the files that make up the Flask Application.
COPY requirements.txt /usr/src/app/
Install all Python requirements for our app to run. This will be accomplished by adding the lines:
COPY requirements.txt /usr/src/app/
RUN pip install --no-cache-dir -r /usr/src/app/requirements.txt
COPY app.py /usr/src/app/
Copy the files you have created earlier into our image by using COPY command.
COPY app.py /usr/src/app/
COPY templates/index.html /usr/src/app/templates/
EXPOSE 5000
Specify the port number which needs to be exposed. Since our flask app is running on 5000 that’s what we’ll expose.
EXPOSE 5000
CMD [“python”, “/usr/src/app/app.py”]
The last step is the command for running the application which is simply python ./app.py. Use the CMD command to do that:
CMD ["python", "/usr/src/app/app.py"]
The primary purpose of CMD is to tell the container which command it should run by default when it is started.
Verify your Dockerfile.
Our Dockerfile is now ready. This is how it looks:
1 2 3 4 5 6 7 8 9 10 11 12 13 14 15 16 17 18 19 | # our base image
FROM alpine:3.5
# Install python and pip
RUN apk add --update py2-pip
# install Python modules needed by the Python app
COPY requirements.txt /usr/src/app/
RUN pip install --no-cache-dir -r /usr/src/app/requirements.txt
# copy files required for the app to run
COPY app.py /usr/src/app/
COPY templates/index.html /usr/src/app/templates/
# tell the port number the container should expose
EXPOSE 5000
# run the application
CMD ["python", "/usr/src/app/app.py"]
|
Build the image (docker build -t id3pvergain/myfirstapp)
Now that you have your Dockerfile, you can build your image.
The docker build command does the heavy-lifting of creating a docker image from a Dockerfile.
When you run the docker build command given below, make sure to replace <YOUR_USERNAME> with your username.
This username should be the same one you created when registering on Docker Cloud. If you haven’t done that yet, please go ahead and create an account.
The docker build command is quite simple - it takes an optional tag name with the -t flag, and the location of the directory containing the Dockerfile - the . indicates the current directory:
docker build -t id3pvergain/myfirstapp .
Y:\projects_id3\P5N001\XLOGCA135_tutorial_docker\tutorial_docker\samples\labs\webapps\app_flask>docker build -t id3pvergain/myfirstapp .
Sending build context to Docker daemon   7.68kB
Step 1/8 : FROM alpine:3.5
3.5: Pulling from library/alpine
550fe1bea624: Pull complete
Digest: sha256:9148d069e50eee519ec45e5683e56a1c217b61a52ed90eb77bdce674cc212f1e
Status: Downloaded newer image for alpine:3.5
 ---> 6c6084ed97e5
Step 2/8 : RUN apk add --update py2-pip
 ---> Running in 1fe5bd53d58d
fetch http://dl-cdn.alpinelinux.org/alpine/v3.5/main/x86_64/APKINDEX.tar.gz
fetch http://dl-cdn.alpinelinux.org/alpine/v3.5/community/x86_64/APKINDEX.tar.gz
(1/12) Installing libbz2 (1.0.6-r5)
(2/12) Installing expat (2.2.0-r1)
(3/12) Installing libffi (3.2.1-r2)
(4/12) Installing gdbm (1.12-r0)
(5/12) Installing ncurses-terminfo-base (6.0_p20170701-r0)
(6/12) Installing ncurses-terminfo (6.0_p20170701-r0)
(7/12) Installing ncurses-libs (6.0_p20170701-r0)
(8/12) Installing readline (6.3.008-r4)
(9/12) Installing sqlite-libs (3.15.2-r1)
(10/12) Installing python2 (2.7.13-r0)
(11/12) Installing py-setuptools (29.0.1-r0)
(12/12) Installing py2-pip (9.0.0-r1)
Executing busybox-1.25.1-r1.trigger
OK: 61 MiB in 23 packages
Removing intermediate container 1fe5bd53d58d
 ---> 23504d4e2c59
Step 3/8 : COPY requirements.txt /usr/src/app/
 ---> 1be30128b66f
Step 4/8 : RUN pip install --no-cache-dir -r /usr/src/app/requirements.txt
 ---> Running in a5f6ada2483d
Collecting Flask==0.10.1 (from -r /usr/src/app/requirements.txt (line 1))
  Downloading Flask-0.10.1.tar.gz (544kB)
Collecting Werkzeug>=0.7 (from Flask==0.10.1->-r /usr/src/app/requirements.txt (line 1))
  Downloading Werkzeug-0.14.1-py2.py3-none-any.whl (322kB)
Collecting Jinja2>=2.4 (from Flask==0.10.1->-r /usr/src/app/requirements.txt (line 1))
  Downloading Jinja2-2.10-py2.py3-none-any.whl (126kB)
Collecting itsdangerous>=0.21 (from Flask==0.10.1->-r /usr/src/app/requirements.txt (line 1))
  Downloading itsdangerous-0.24.tar.gz (46kB)
Collecting MarkupSafe>=0.23 (from Jinja2>=2.4->Flask==0.10.1->-r /usr/src/app/requirements.txt (line 1))
  Downloading MarkupSafe-1.0.tar.gz
Installing collected packages: Werkzeug, MarkupSafe, Jinja2, itsdangerous, Flask
  Running setup.py install for MarkupSafe: started
        Running setup.py install for MarkupSafe: finished with status 'done'
  Running setup.py install for itsdangerous: started
        Running setup.py install for itsdangerous: finished with status 'done'
  Running setup.py install for Flask: started
        Running setup.py install for Flask: finished with status 'done'
Successfully installed Flask-0.10.1 Jinja2-2.10 MarkupSafe-1.0 Werkzeug-0.14.1 itsdangerous-0.24
You are using pip version 9.0.0, however version 9.0.1 is available.
You should consider upgrading via the 'pip install --upgrade pip' command.
Removing intermediate container a5f6ada2483d
 ---> 68467d64c546
Step 5/8 : COPY app.py /usr/src/app/
 ---> 62a6a857c6cd
Step 6/8 : COPY templates/index.html /usr/src/app/templates/
 ---> 639c61ea4a4b
Step 7/8 : EXPOSE 5000
 ---> Running in c15c0178577c
Removing intermediate container c15c0178577c
 ---> f6d0fdcd6c29
Step 8/8 : CMD ["python", "/usr/src/app/app.py"]
 ---> Running in 222f91658593
Removing intermediate container 222f91658593
 ---> 0ce3c7641c9a
Successfully built 0ce3c7641c9a
Successfully tagged id3pvergain/myfirstapp:latest
SECURITY WARNING: You are building a Docker image from Windows against a non-Windows Docker host. All files and directories added to build context will have '-rwxr-xr-x' permissions. It is recommended to double check and reset permissions for sensitive files and directories.
If you don’t have the alpine:3.5 image, the client will first pull the image and then create your image. Therefore, your output on running the command will look different from mine. If everything went well, your image should be ready!
docker images
Run docker images and see if your image (<YOUR_USERNAME>/myfirstapp) shows.
Y:projects_id3P5N001XLOGCA135_tutorial_dockertutorial_dockersampleslabswebappsapp_flask>docker images
REPOSITORY                  TAG                 IMAGE ID            CREATED             SIZE
id3pvergain/myfirstapp      latest              0ce3c7641c9a        2 minutes ago       56.4MB
ubuntu                      16.04               2a4cca5ac898        38 hours ago        111MB
ubuntu                      trusty              02a63d8b2bfa        38 hours ago        222MB
friendlyhello               latest              ed5b70620e49        2 days ago          148MB
id3pvergain/get-started     part2               ed5b70620e49        2 days ago          148MB
alpine                      3.5                 6c6084ed97e5        7 days ago          3.99MB
alpine                      latest              3fd9065eaf02        7 days ago          4.15MB
wordpress                   latest              28084cde273b        8 days ago          408MB
centos                      latest              ff426288ea90        8 days ago          207MB
nginx                       latest              3f8a4339aadd        3 weeks ago         108MB
ubuntu                      latest              00fd29ccc6f1        4 weeks ago         111MB
python                      2.7-slim            4fd30fc83117        5 weeks ago         138MB
hello-world                 latest              f2a91732366c        8 weeks ago         1.85kB
docker4w/nsenter-dockerd    latest              cae870735e91        2 months ago        187kB
dockersamples/static-site   latest              f589ccde7957        22 months ago       191MB
Run your image (docker run -p 8888:5000 –name myfirstapp id3pvergain/myfirstapp)
The next step in this section is to run the image and see if it actually works.
   docker run -p 8888:5000 --name myfirstapp id3pvergain/myfirstapp


* Running on http://0.0.0.0:5000/ (Press CTRL+C to quit)
Head over to http://localhost:8888 and your app should be live.
Note
If you are using Docker Machine, you may need to open up another terminal and determine the container ip address using docker-machine ip default.
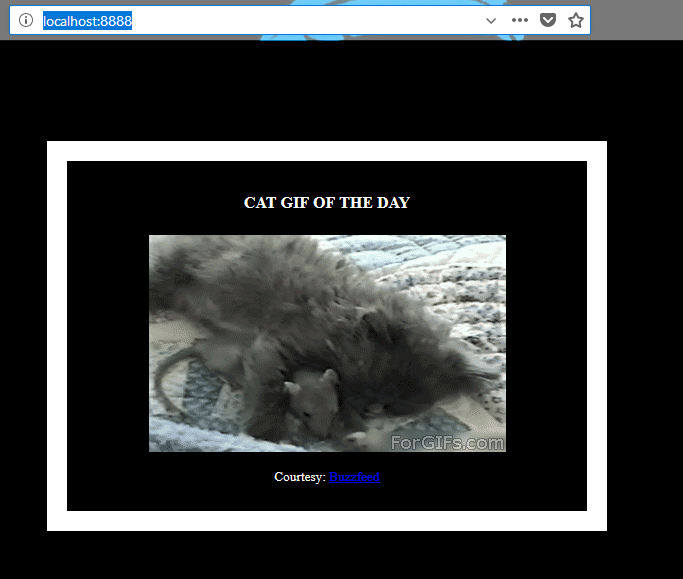
Hit the Refresh button in the web browser to see a few more cat images.
Push your image (docker push id3pvergain/myfirstapp)
Now that you’ve created and tested your image, you can push it to Docker Cloud.
First you have to login to your Docker Cloud account, to do that:
docker login
Y:\projects_id3\P5N001\XLOGCA135_tutorial_docker\tutorial_docker\samples\labs\webapps\app_flask>docker login
Login with your Docker ID to push and pull images from Docker Hub. If you don't have a Docker ID, head over to https://hub.docker.com to create one.
Username (id3pvergain):
Password:
Login Succeeded
docker push id3pvergain/myfirstapp
Y:\projects_id3\P5N001\XLOGCA135_tutorial_docker\tutorial_docker\samples\labs\webapps\app_flask>docker push id3pvergain/myfirstapp
The push refers to repository [docker.io/id3pvergain/myfirstapp]
b7591dd05809: Pushed
cd36128c70d4: Pushed
cea459424f6e: Pushed
6ac80674ef6a: Pushed
de7b45529bcb: Pushed
d39d92664027: Mounted from library/alpine
latest: digest: sha256:8f945ed63e2dc3ef3fa178fe4dded5a68eae07c5c9e854ec278c7cfa2c6bc6bb size: 1572
docker rm -f myfirstapp
Now that you are done with this container, stop and remove it since you won’t be using it again.
Open another terminal window and execute the following commands:
docker stop myfirstapp
docker rm myfirstapp
or:
docker rm -f myfirstapp
myfirstapp
Dockerfile commands summary
Here’s a quick summary of the few basic commands we used in our Dockerfile.
FROM
FROM starts the Dockerfile. It is a requirement that the Dockerfile must start with the FROM command. Images are created in layers, which means you can use another image as the base image for your own. The FROM command defines your base layer. As arguments, it takes the name of the image. Optionally, you can add the Docker Cloud username of the maintainer and image version, in the format username/imagename:version.
RUN
RUN is used to build up the Image you’re creating. For each RUN command, Docker will run the command then create a new layer of the image. This way you can roll back your image to previous states easily. The syntax for a RUN instruction is to place the full text of the shell command after the RUN (e.g., RUN mkdir /user/local/foo). This will automatically run in a /bin/sh shell. You can define a different shell like this: RUN /bin/bash -c ‘mkdir /user/local/foo’
CMD
CMD defines the commands that will run on the Image at start-up.
Unlike a RUN, this does not create a new layer for the Image, but simply runs the command.
There can only be one CMD per a Dockerfile/Image.
If you need to run multiple commands, the best way to do that is to have the CMD run a script. CMD requires that you tell it where to run the command, unlike RUN.
So example CMD commands would be:
CMD [“python”, “./app.py”]
CMD [“/bin/bash”, “echo”, “Hello World”]
EXPOSE
EXPOSE creates a hint for users of an image which ports provide services. It is included in the information which can be retrieved via docker inspect <container-id>.
Note
The EXPOSE command does not actually make any ports accessible to the host! Instead, this requires publishing ports by means of the -p flag when using $ docker run.
Next Steps : Deploying an app to a Swarm
See also
For the next step in the tutorial head over to 3.0 Deploying an app to a Swarm